

PLANS-BUILT
PROJECTS
ON THIS
SITE


XR2 HP
 |
XR3 HYBRID

URBA TRIKE

TRIMUTER

URBA
ELECTRIC

TOWN CAR

URBA CAR
BUDGET
CAMPER

MINIHOME

PHOENIX

BOONIE BUG

HYDRORUNNER

SUPER SPA

|

 Join us on Facebook Join us on Facebook
One-Off Construction Using
Fiberglass Over Foam
An Overview of
How to Work with Fiberglass Over Foam
by Robert Q. Riley
Revised September 2014 |
|

|
|
The automotive application of FRP/foam
composite was pioneered in the 1970's by the author's former design firm, Quincy-Lynn
Enterprises, Inc. We used polyester resin and glass
cloth laminations over a core of rigid urethane foam boardstock (fiberglass over foam). Modern variations
sometimes use an epoxy resin or vinyl-ester resin and carbon-fiber-cloth over urethane foam, like the composite used to build GM's Ultralite experimental passenger car. Carbon fiber materials are far more costly, and it's questionable as to whether the value matches the extra expense. Despite the strength-to-weight
advantage of newer materials, nothing matches the original polyester-resin/glass-cloth/urethane-foam composite for quickly producing a tough,
lightweight product at rock-bottom costs. And it's a surprisingly simple system to
use.
You can use this composite to make virtually anything, from a vehicle body to a boat. The following description takes you step-by-step through a fiberglass/foam
composite buildup of a vehicle body. To illustrate the process, we've included photos taken at various
stages during the construction of Tri-Magnum; a high-performance three-wheeler for which plans are available on this site. The techniques, however, will work equally well in other
applications. And Tri-Magnum plans include far more detail than is shown in this overview.
If you want to go ahead with a custom project (not necessarily Tri-Magnum) and just want to know how to do it, the XR3 Hybrid plans-on-disc provides the greatest detail, plus an hour-long video showing how the fiberglass is applied and reinforced. (See the box at the bottom of this page.) If you're planning a project in fiberglass/foam composite, the XR3 plans-on-disc will give you a much deeper understanding for minimal expense. Plans also cover hinge, fixture, and glazing design, which lets you design your own hinges and fixtures and correctly anchor them into the fiberglass. This composite process also works equally well for building a plug for a traditional fiberglass mold.
A Low-Cost and Forgiving Material
A typical automobile body will require about $900 worth of plywood, urethane foam, and
standard polyester fiberglass (the same material used to build boats, kit cars, and
production Corvettes). The body is first built of inexpensive foam boardstock
(typically, 4 x 8 foot panels of 1-inch thick material) cemented in place over station
formers. The foam core or buck can also serve as a low-cost, full-size styling
mockup. Figure about $250 for enough plywood and foam, and about three or four days
of assembly time to build a typical automobile body-in-foam.
If the design does not work well in three dimensions, it can be modified by stacking on
extra foam and reshaping it. Or you can discard the first attempt and start over
with only minimal loss in materials cost. And assembly is virtually painless. Using
a razor knife, urethane foam cuts like butter, and it sands so easily you can rub two
pieces together and watch it melt away. Fiberglass is applied to encapsulate the
foam only after the design has been fully refined. Smoothing out the fiberglass to
prepare it for paint is the most labor-intensive part of the process. But even here,
modern plastic body-fillers and spray-on primer/surfacers like "Featherfil" and
"Eliminator" make the job far easier than the original sanded-gelcoat method
used when the system was first developed.
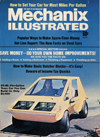
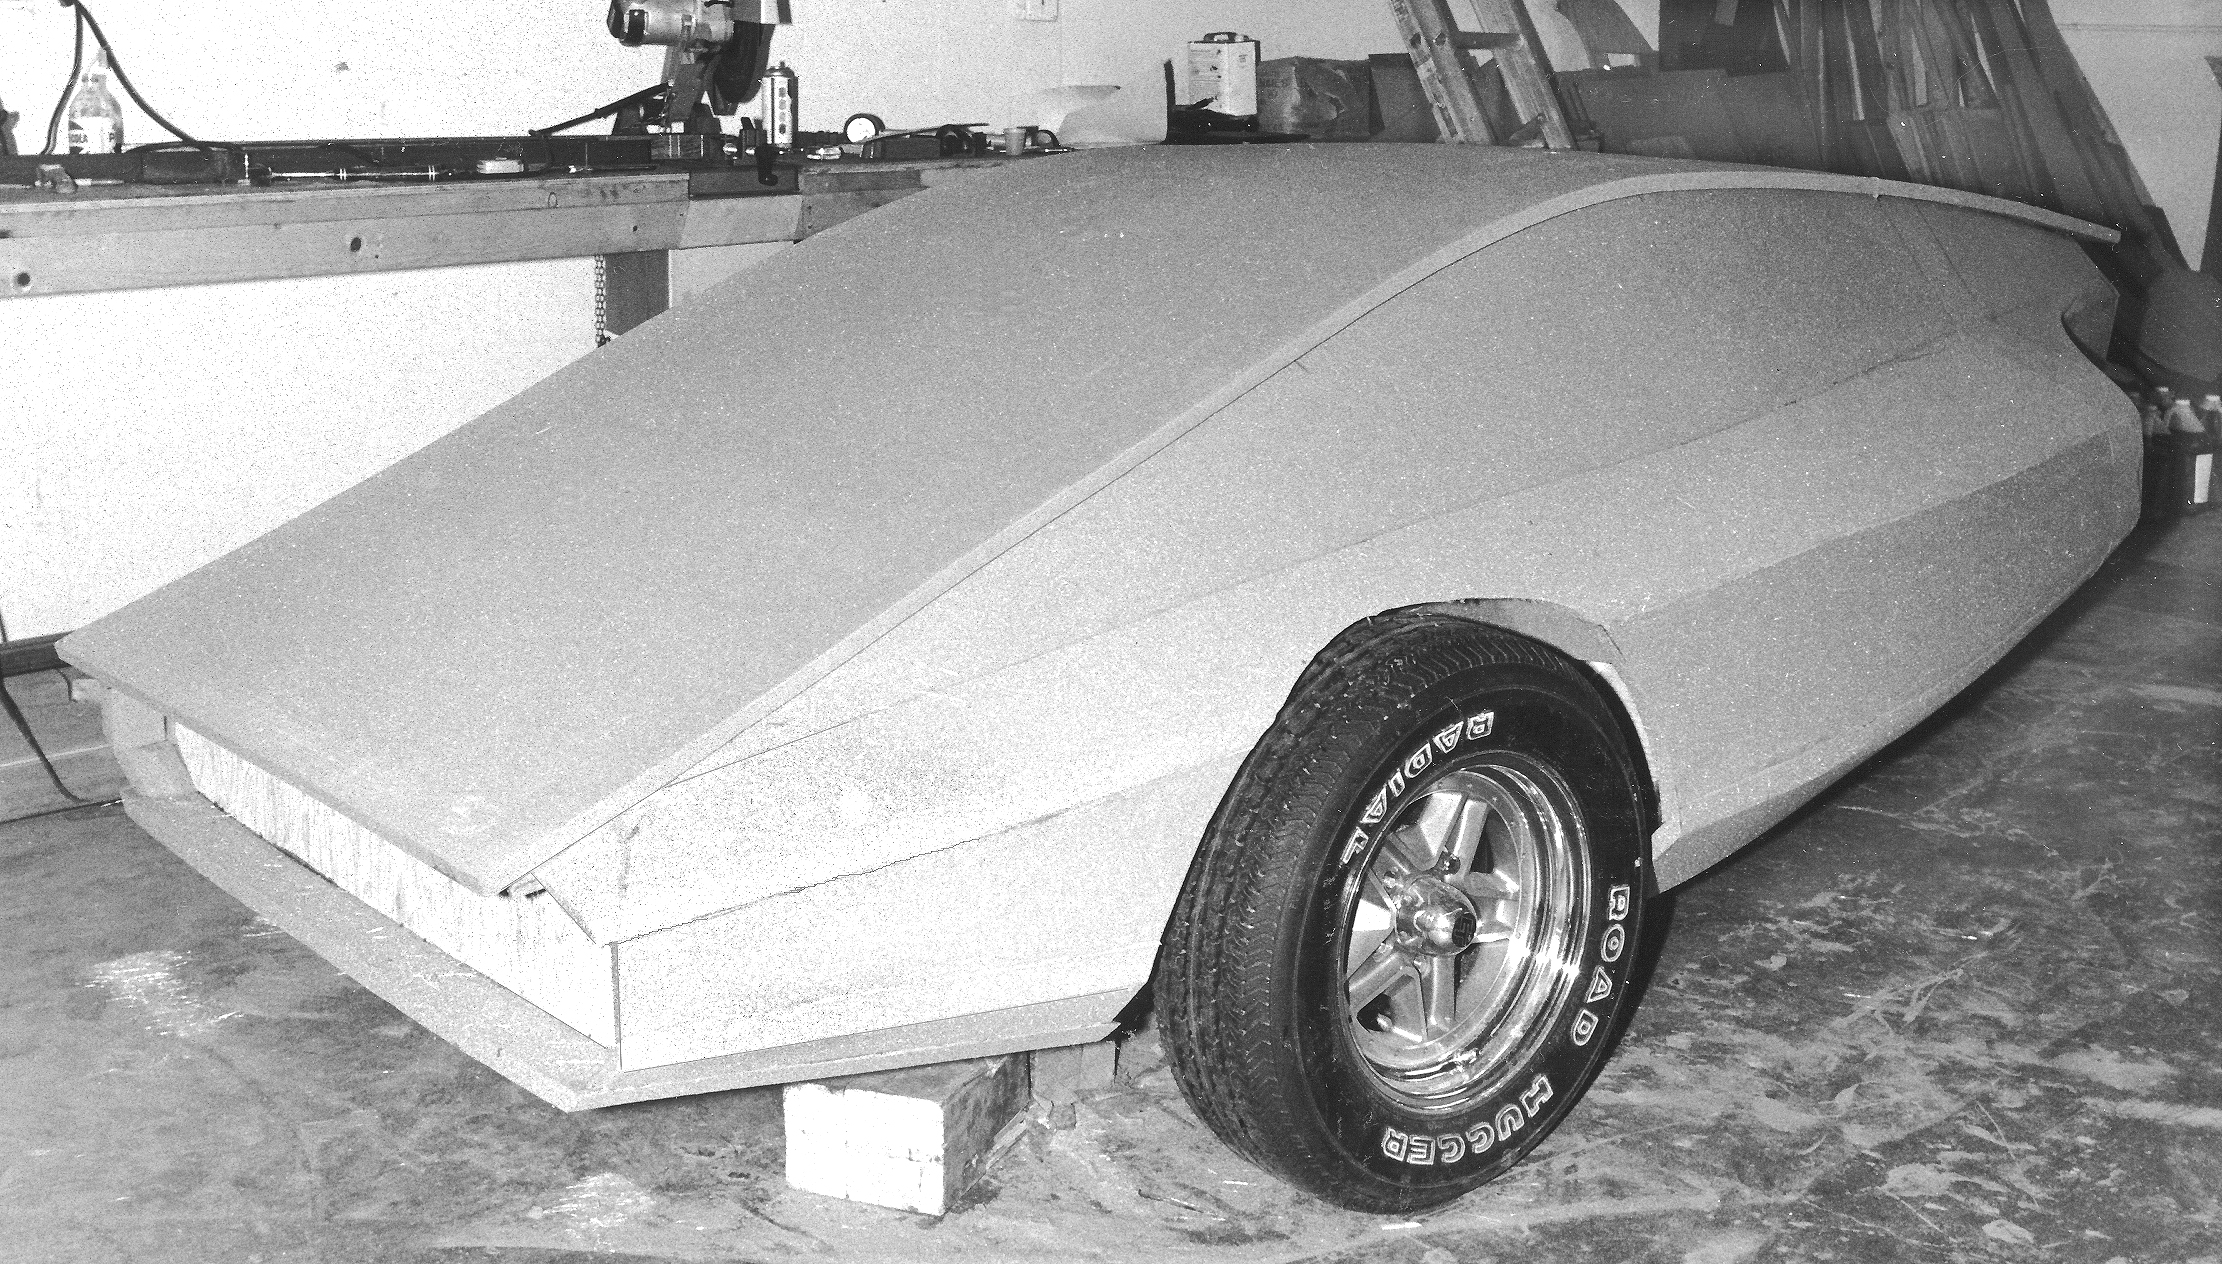
Begin by Attaching Plywood Station Formers
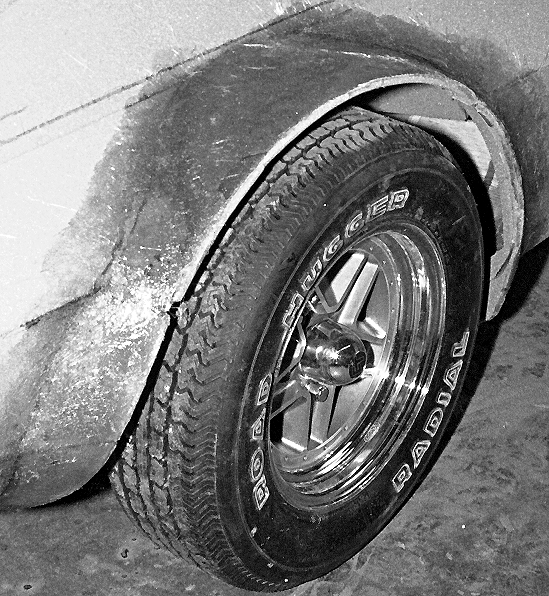
A body project begins with the chassis supported at ride-height. Normally, the
wheels must be removed so they do not interfere with the smooth curvature of the
foam panels. Plywood station formers are then attached at appropriate locations
along the length. The correct placement and number of station formers will depend on
the body design and the location of convenient attachment points on the chassis. Station
formers normally become part of the finished body where they serve as cabin bulkheads, a
firewall, and/or body-to-chassis attachment points. Click photos on along right of page for a large version. |
Install Station Formers: Tri-Magnum needed only four station formers to carry body contours smoothly from
front to rear. Normally, wheels must be removed before foam panels can be installed.
Station formers are bolted in place so the body can be removed later on. |
|
Use Stringers to Trace the Shape of Foam Panels
Some builders may prefer to calculate the shape of foam panels from drawings. A
quicker, hands-on method is to attach temporary stringers across station formers at each
break in the shape (to become foam panel mating points). Body panels can then be traced
directly onto the foam using the stringers as a guide. Cut foam panels oversize then shape
them to fit as they are installed. Use a solvent-based contact cement to bond the foam to
adjacent panels (water-based cements do not work well on urethane foam). It's best to wear
a particle respirator when working with exposed urethane foam (before it is fiberglassed
over) to avoid inhaling airborne particles caused by sanding. At commercial sites,
these dust respirators are required by OSHA.
|
Fitting the Foam: Using a felt marker, trace along the edges of stringers to outline panels on the
foam. Cut the foam with a razor knife. Normally, mating edges must be sanded and
shaped for a good fit against adjoining panels. |
|
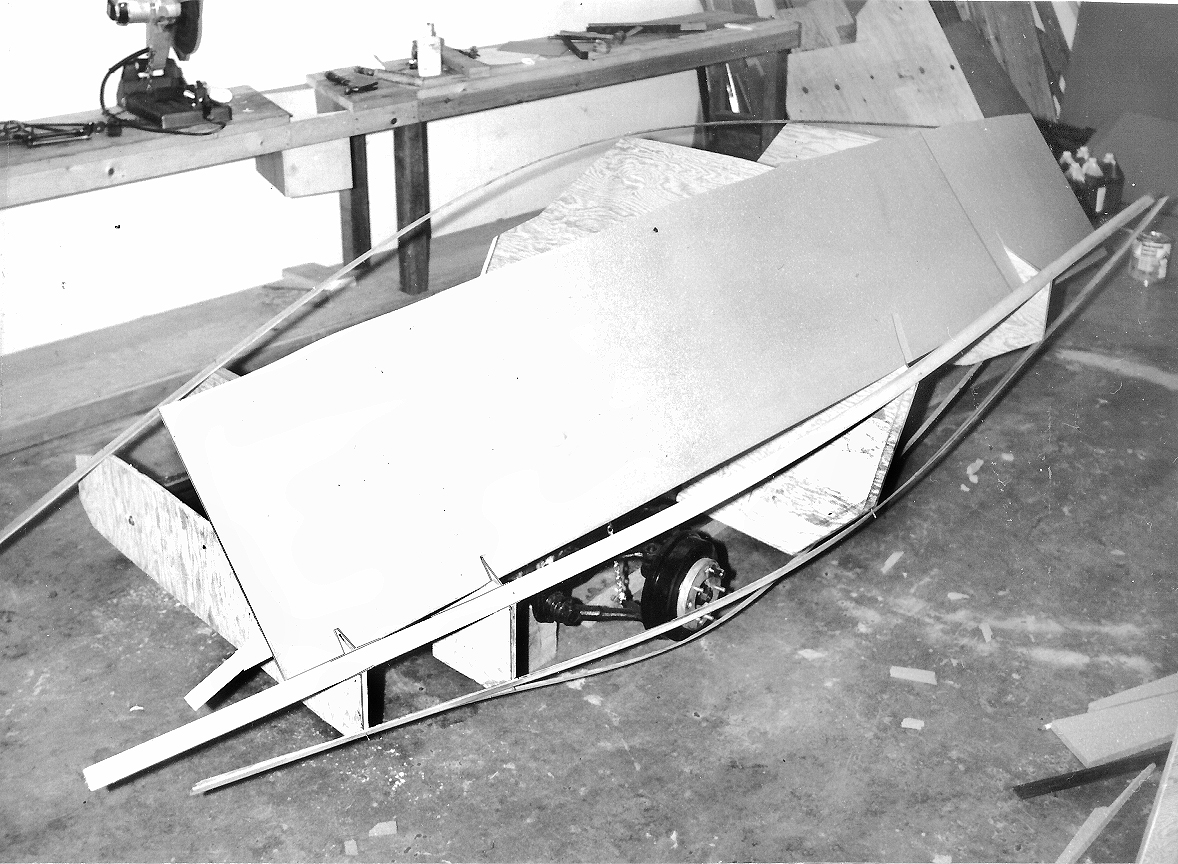
Assemble Foam Panels in Obvious Sequence
The correct sequence of assembly will depend upon your particular design. Tri-Magnum's
foam body begins with lengthwise panels installed at the widest point of the body. With
other designs, it may be better to install the floorboard first and work upward. Where
interior structures are essential for strength, install them and secure the seams with a
lay-up of fiberglass mat on the inside. With Tri-Magnum, most of the passenger compartment
was assembled and fiberglassed before the roof panel was installed. Often, however,
interior details are easier to install after the body has been fiberglassed. The
idea is to build a bodyshell and stabilize it with fiberglass before tackling all the
details. The correct construction sequence depends on structural considerations and
on which items will be inaccessible later on.
|
Install Foam Panels: Assemble panels in obvious sequence. Cut the foam oversize then sand and
shape the edges to fit against adjacent panels. Cement the foam panels in place
using a solvent-based contact cement. Do not use a water-based adhesive.
Water-based adhesives do not work well with urethane foam. |
|
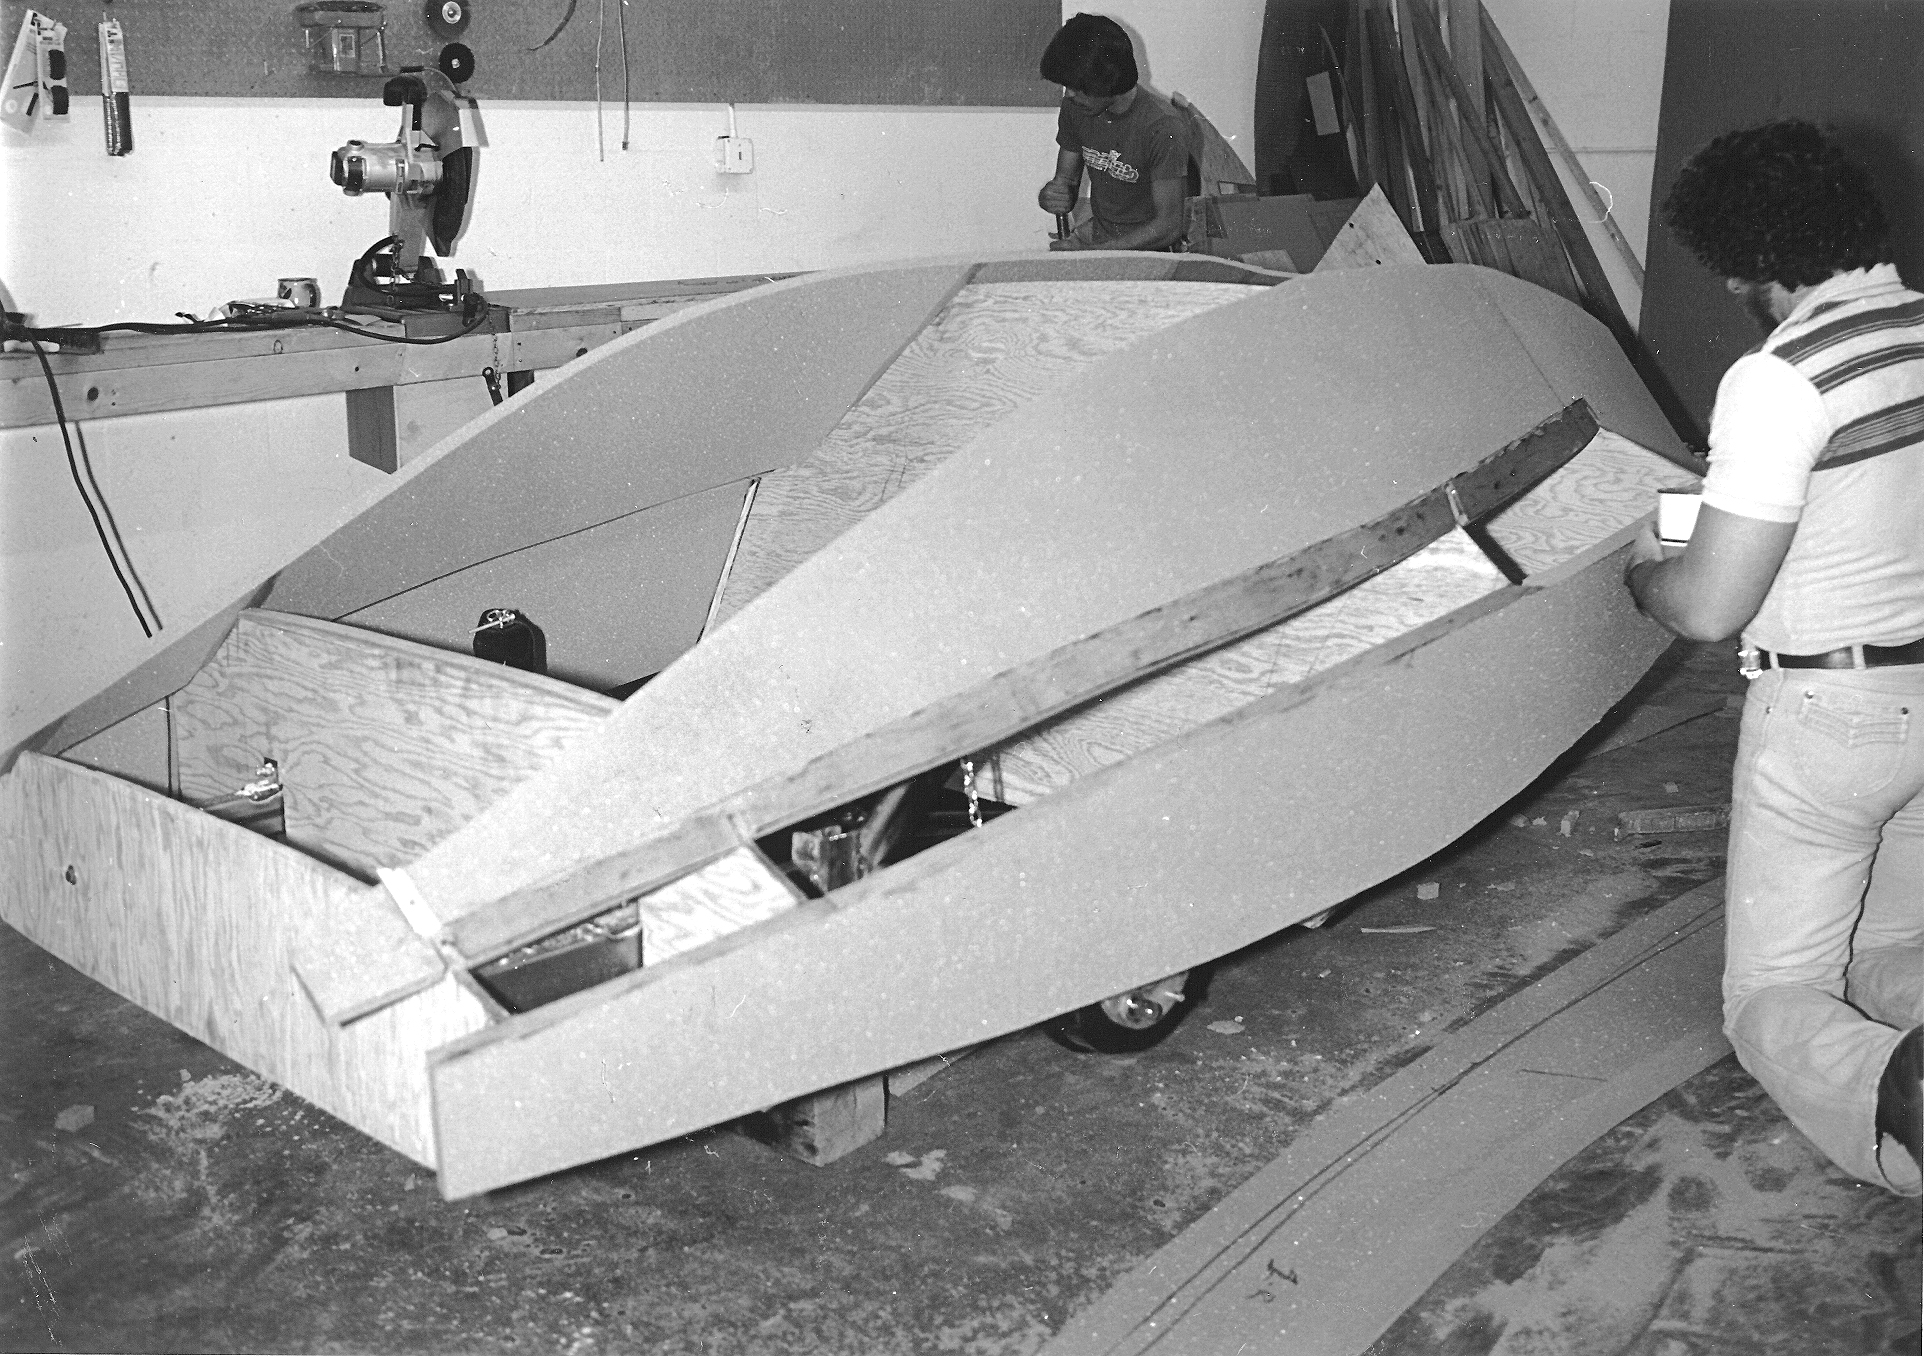
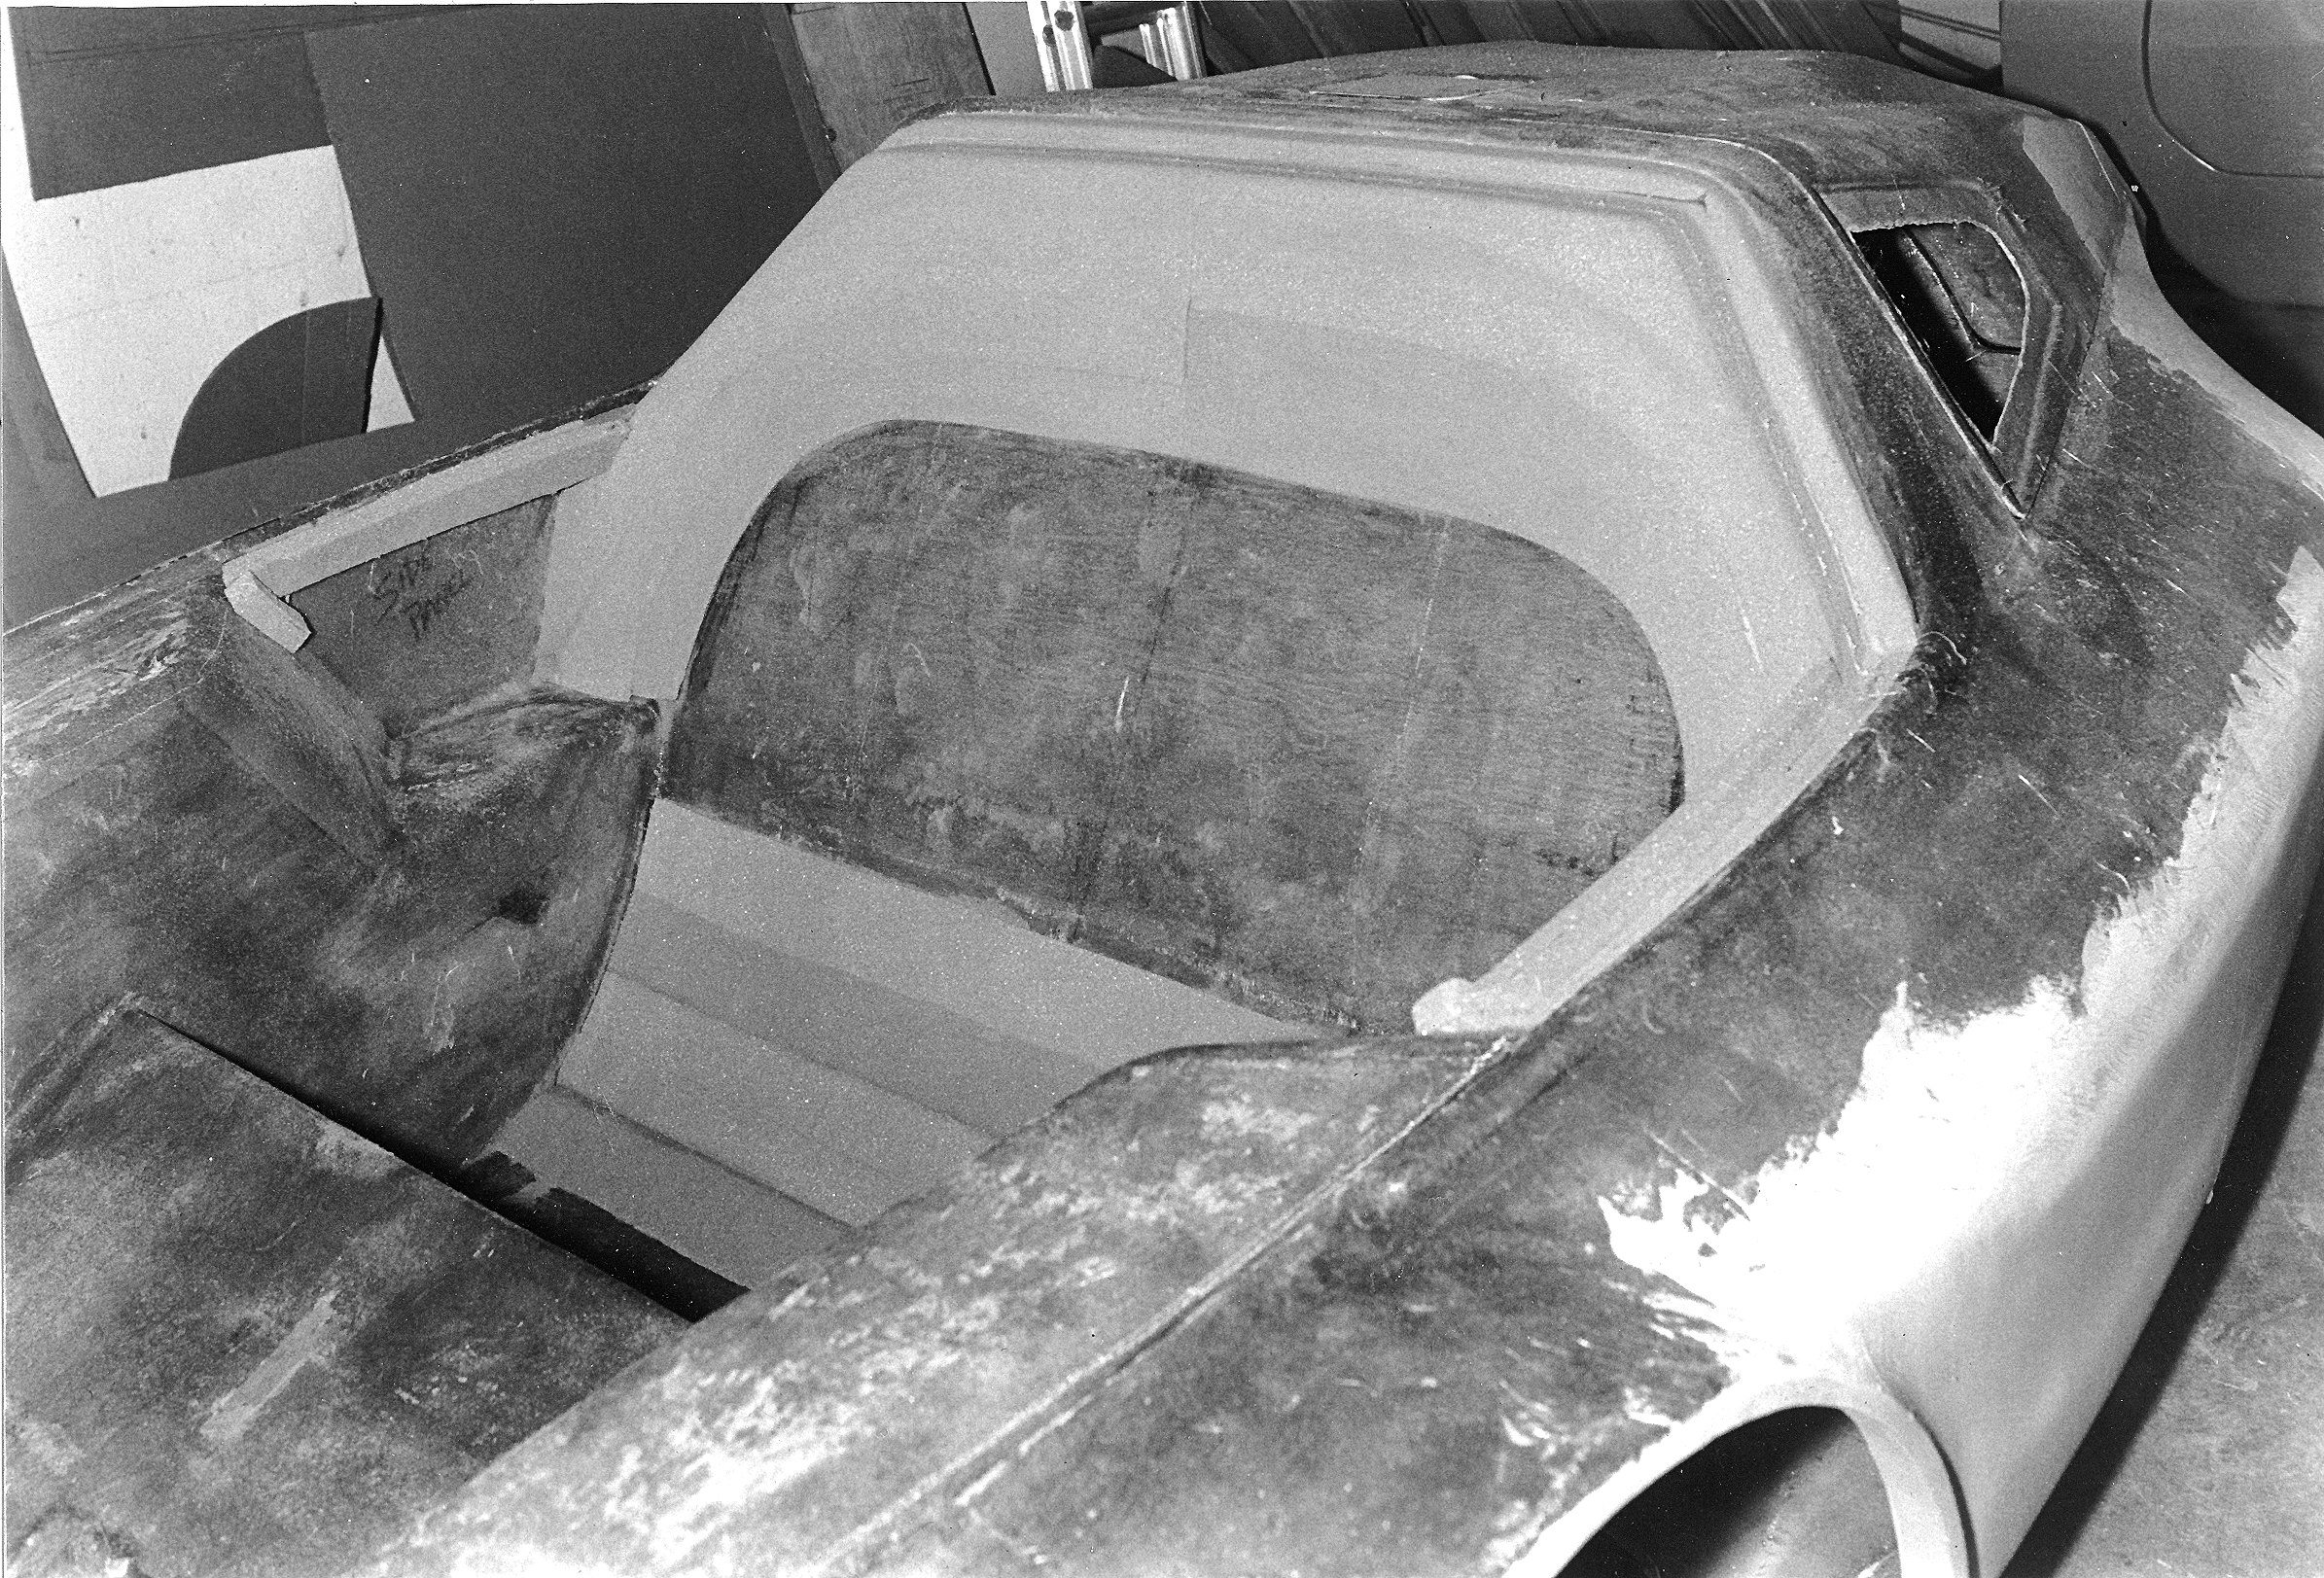
Detail the Occupant Zone: Tri-Magnum's passenger compartment is detailed before closing up the body. The
center has been cut from the second station former to make room for the occupants' legs.
The foam panel in the center is temporary. It is used to hold a convex curvature in
the roof panel. Without this temporary panel, the roof panel would sag across the
windshield area. Remove the temporary foam panel after the exterior has been
fiberglassed. |
|
Close The Roof: A final panel across the roof closes the body. Notice that the roof panel
overhangs along the side. This excess material can be quickly trimmed with a razor knife,
or filed flush using a body file. Block-sanding along seams will bring panels flush. |
|
Add Details to the Foam Body
The foam body begins to look more like a finished product as details are added. The
one-inch-thick foam boardstock provides plenty of material for deeply rounding the corners
to eliminate the panelized look. Urethane foam is easily shaped with a Surform file or a
sanding block. Some of the details may require strengthening with a lay-up of fiberglass
as they are installed. For example, Tri-Magnum's wheel well eyebrows were extremely thin
and they extended quite far from the body. Consequently, they were reinforced with
fiberglass so they would hold their shape and stand up to the occasional assault of a
dropped tool.
|
Create Wheel Well Eyebrows: Tri-Magnum's wheel well eyebrows are made from 1/2-inch thick foam panels, which
are cemented in place. A mat lay-up over the top secures the easily damaged
eyebrows. Use this technique of strengthening the foam with a fiberglass overlay at any
point that needs reinforcement. |
|
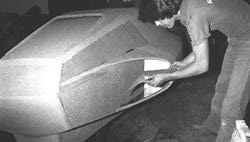
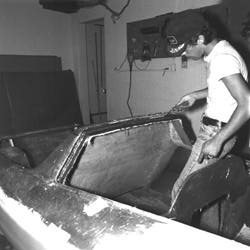
Detail Tail Light Wells: In the adjacent photo, the workman is adding a foam fillet to finish the inside of
a rear light bay. Although one should avoid creating air pockets inside the foam
structure, in this case, a small pocket will exist between the fillet being installed in
the photo and the foam panel on the exterior of the body. |
|
|
Outline doors and windows with a felt marker then sand recesses and
cut-lines into the foam using a sanding block. Windows are left intact to avoid
releasing tension that might be holding a curvature into adjacent panels. The
intricate detailing possible with urethane foam is apparent in the following photographs.
|
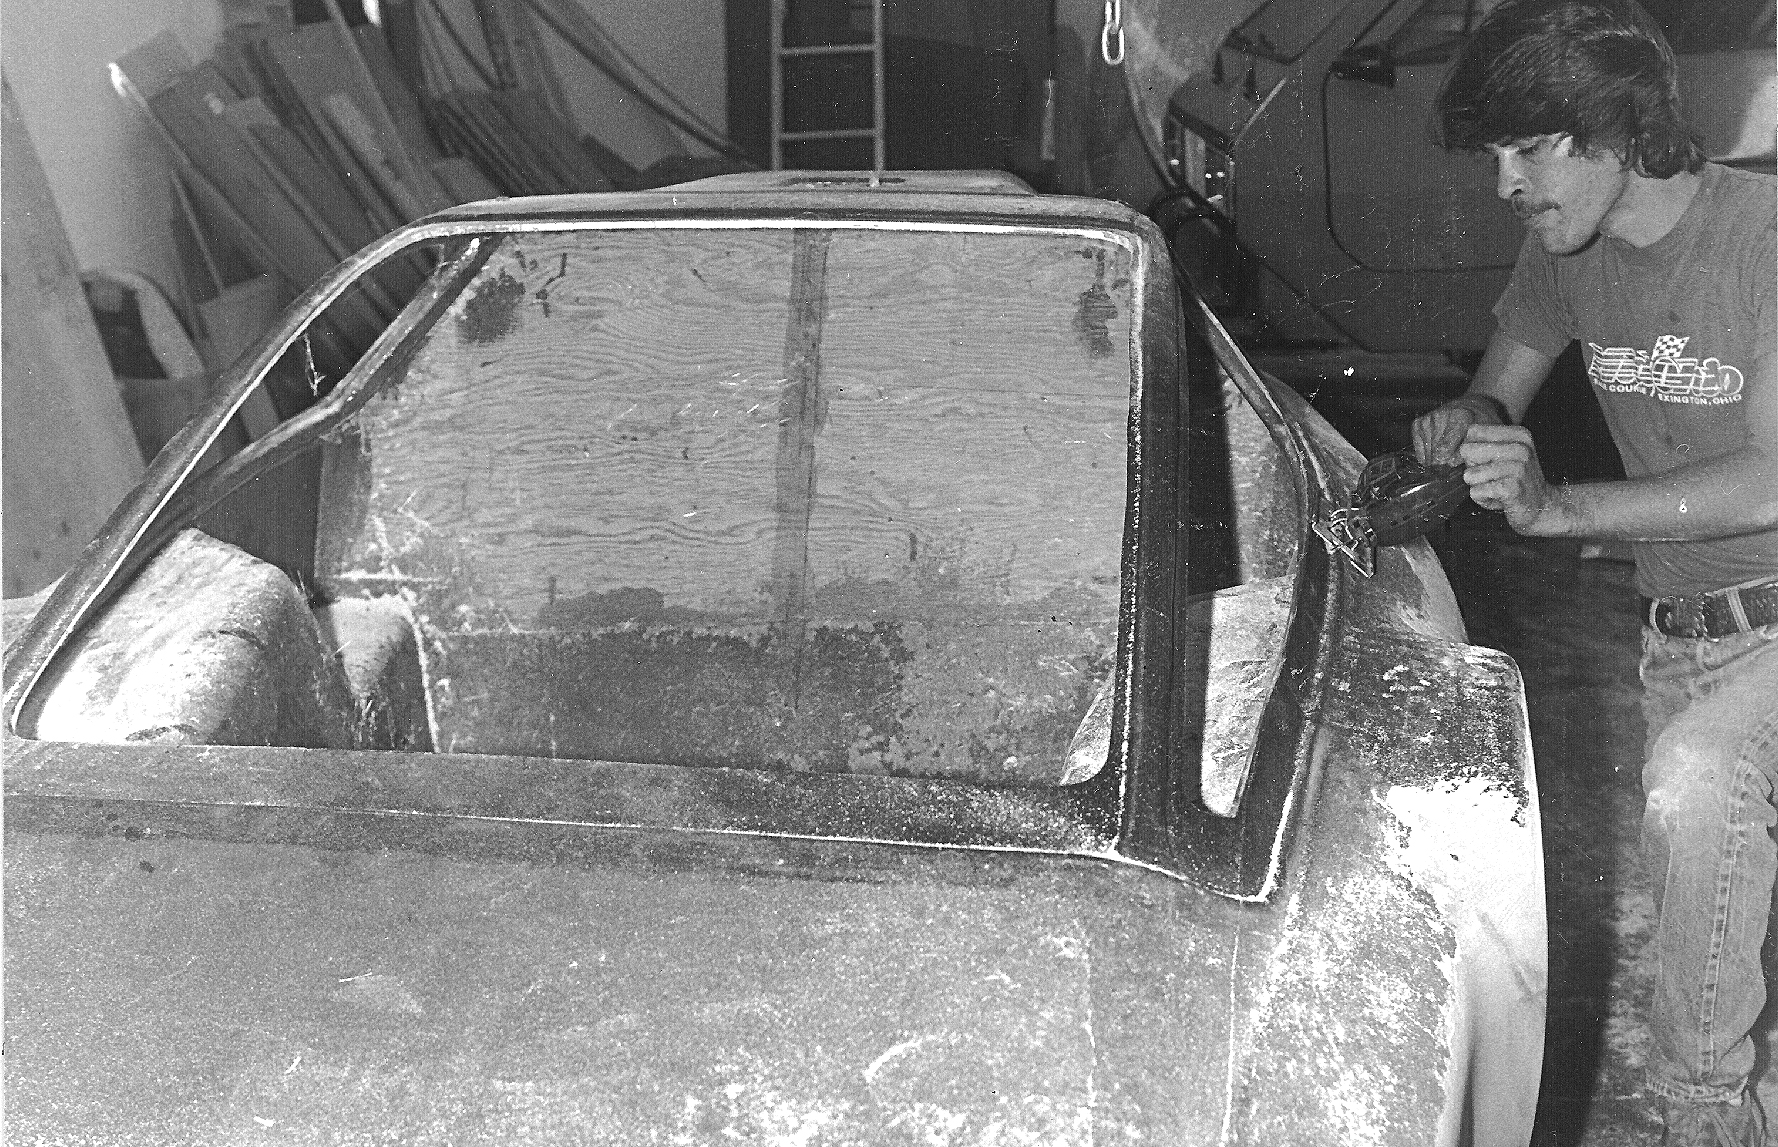
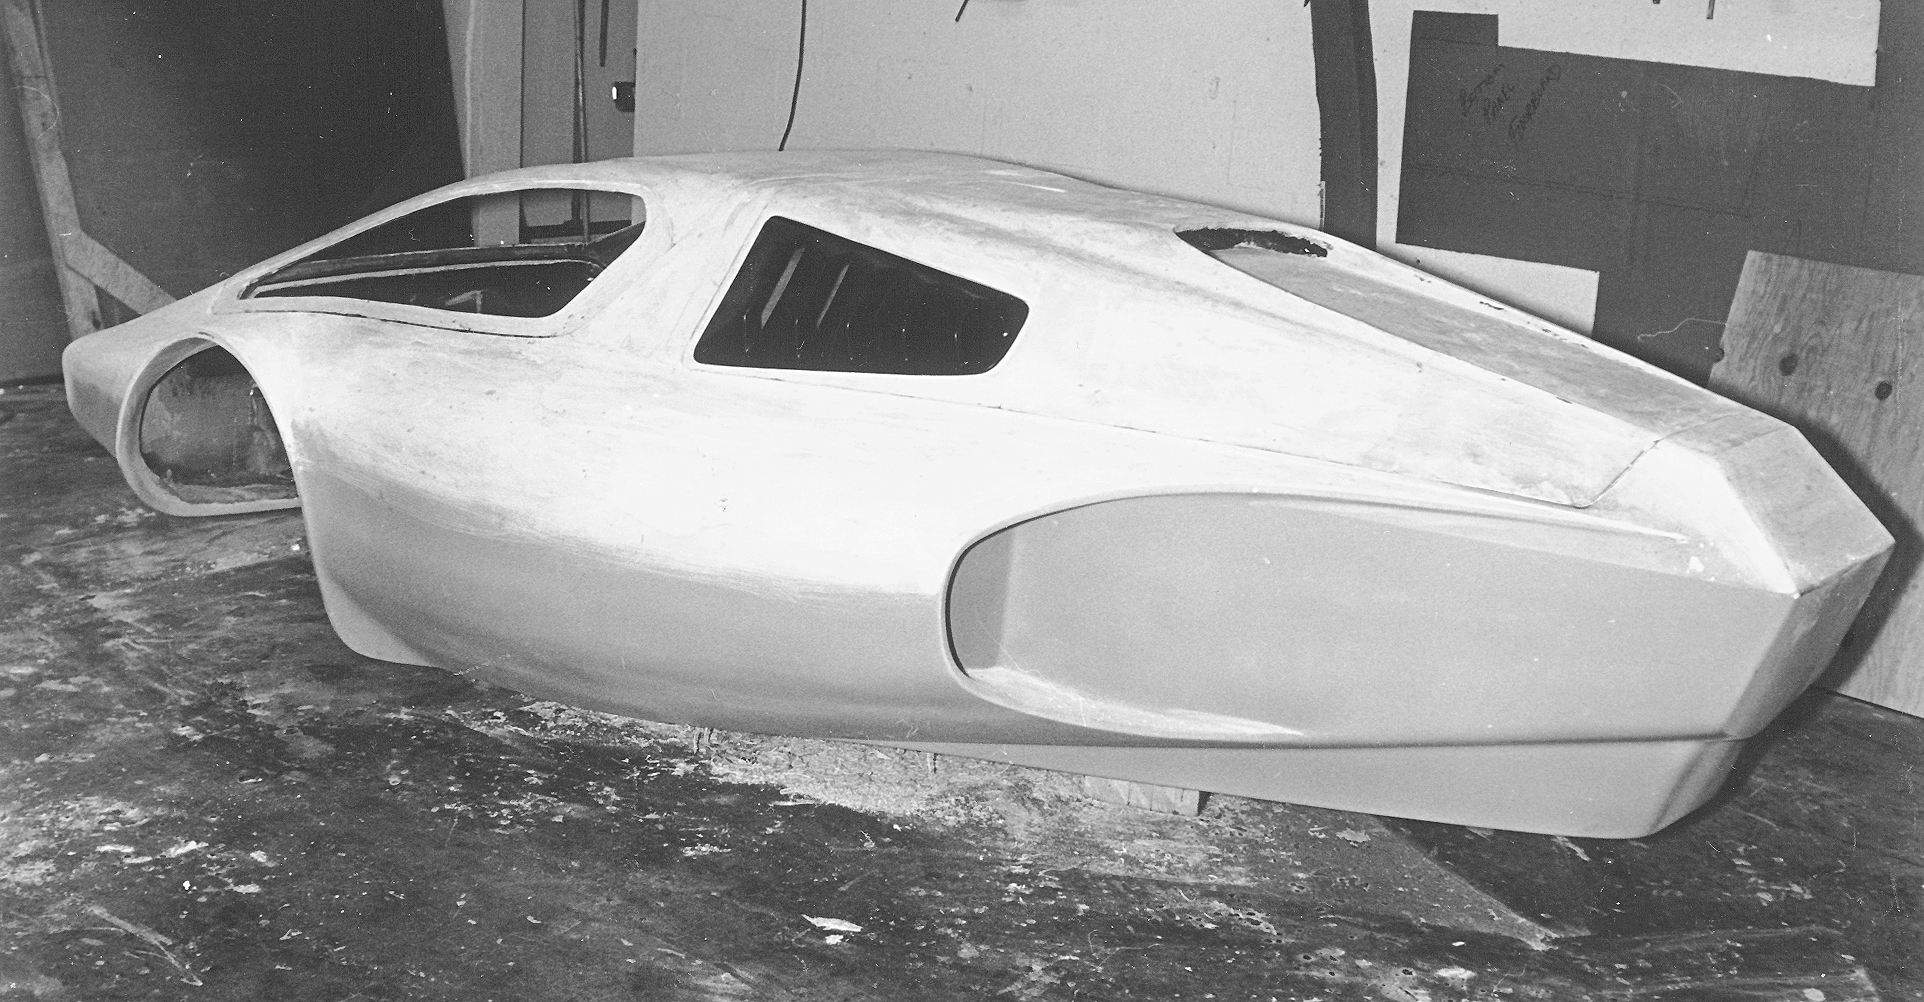
Sand Window Flanges into Body: Recessed mating flanges for glazing (windows) and accessories, as well as
door/canopy trim-lines are sanded into the surface of the foam before it is fiberglassed. |
|
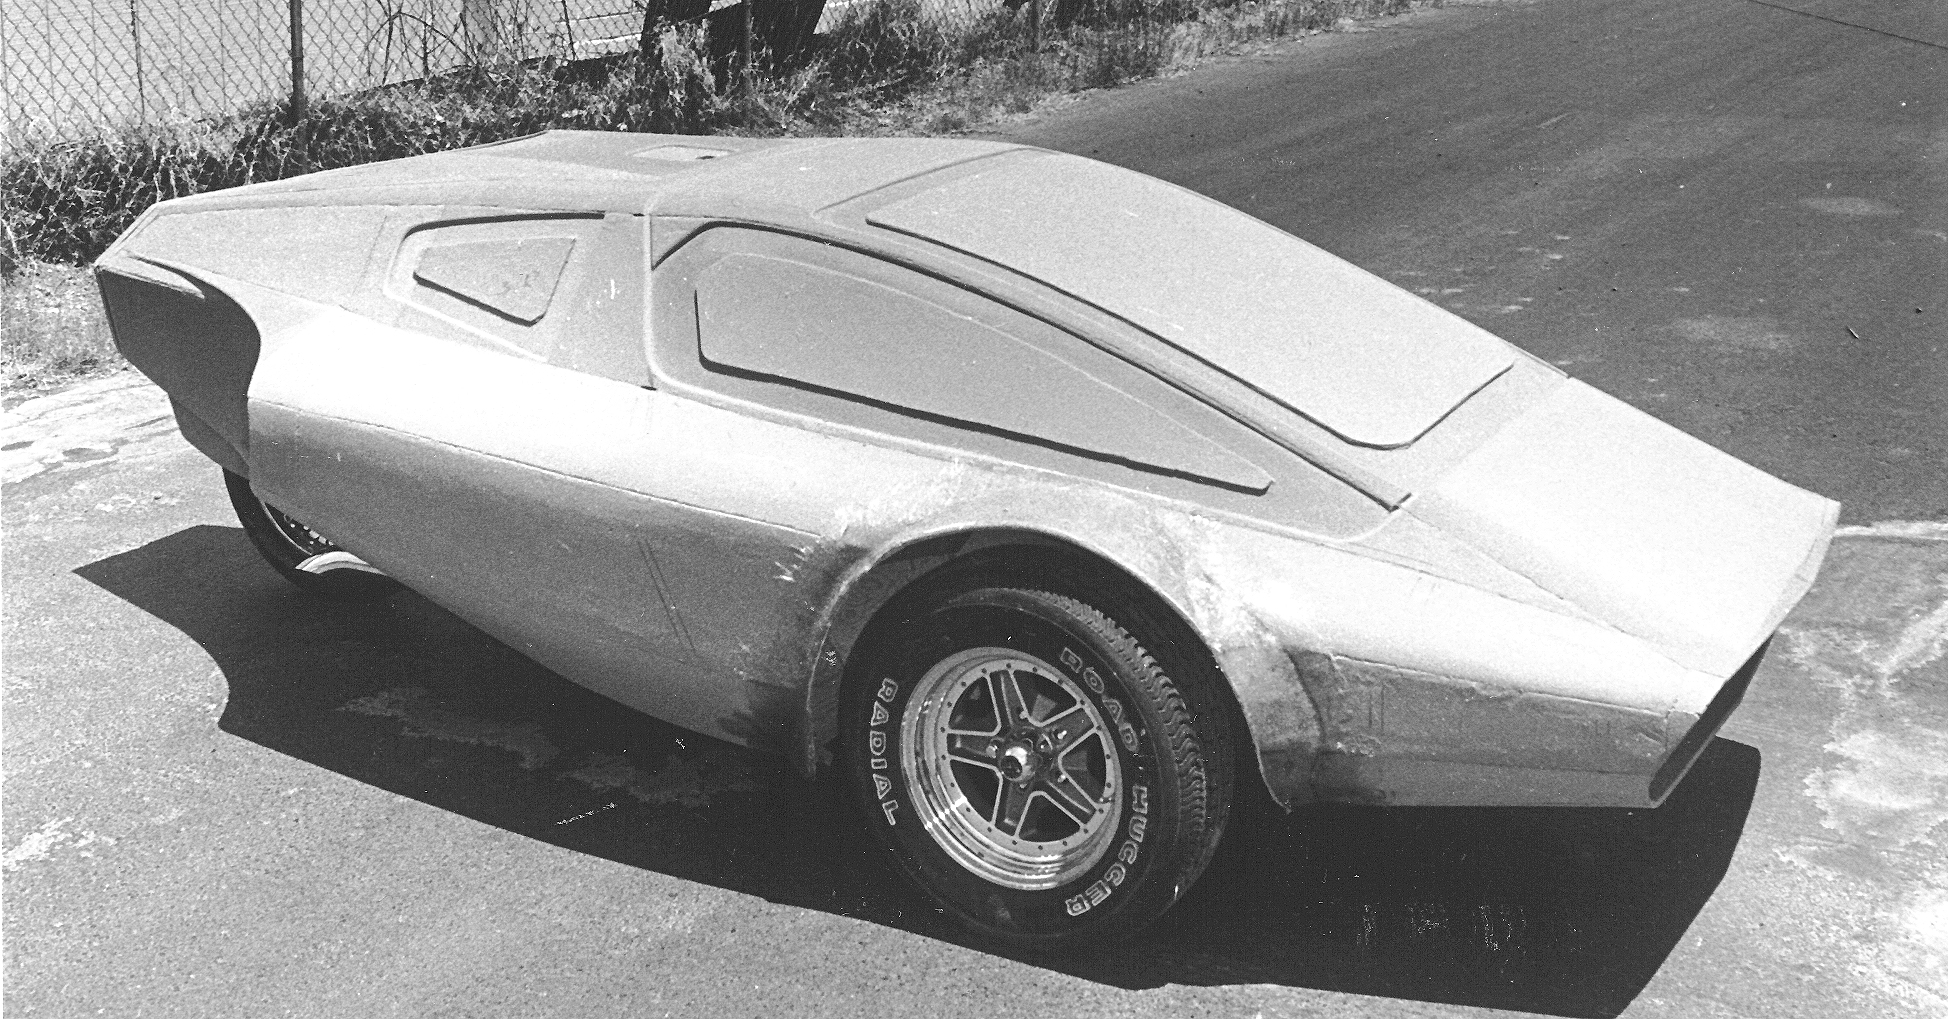
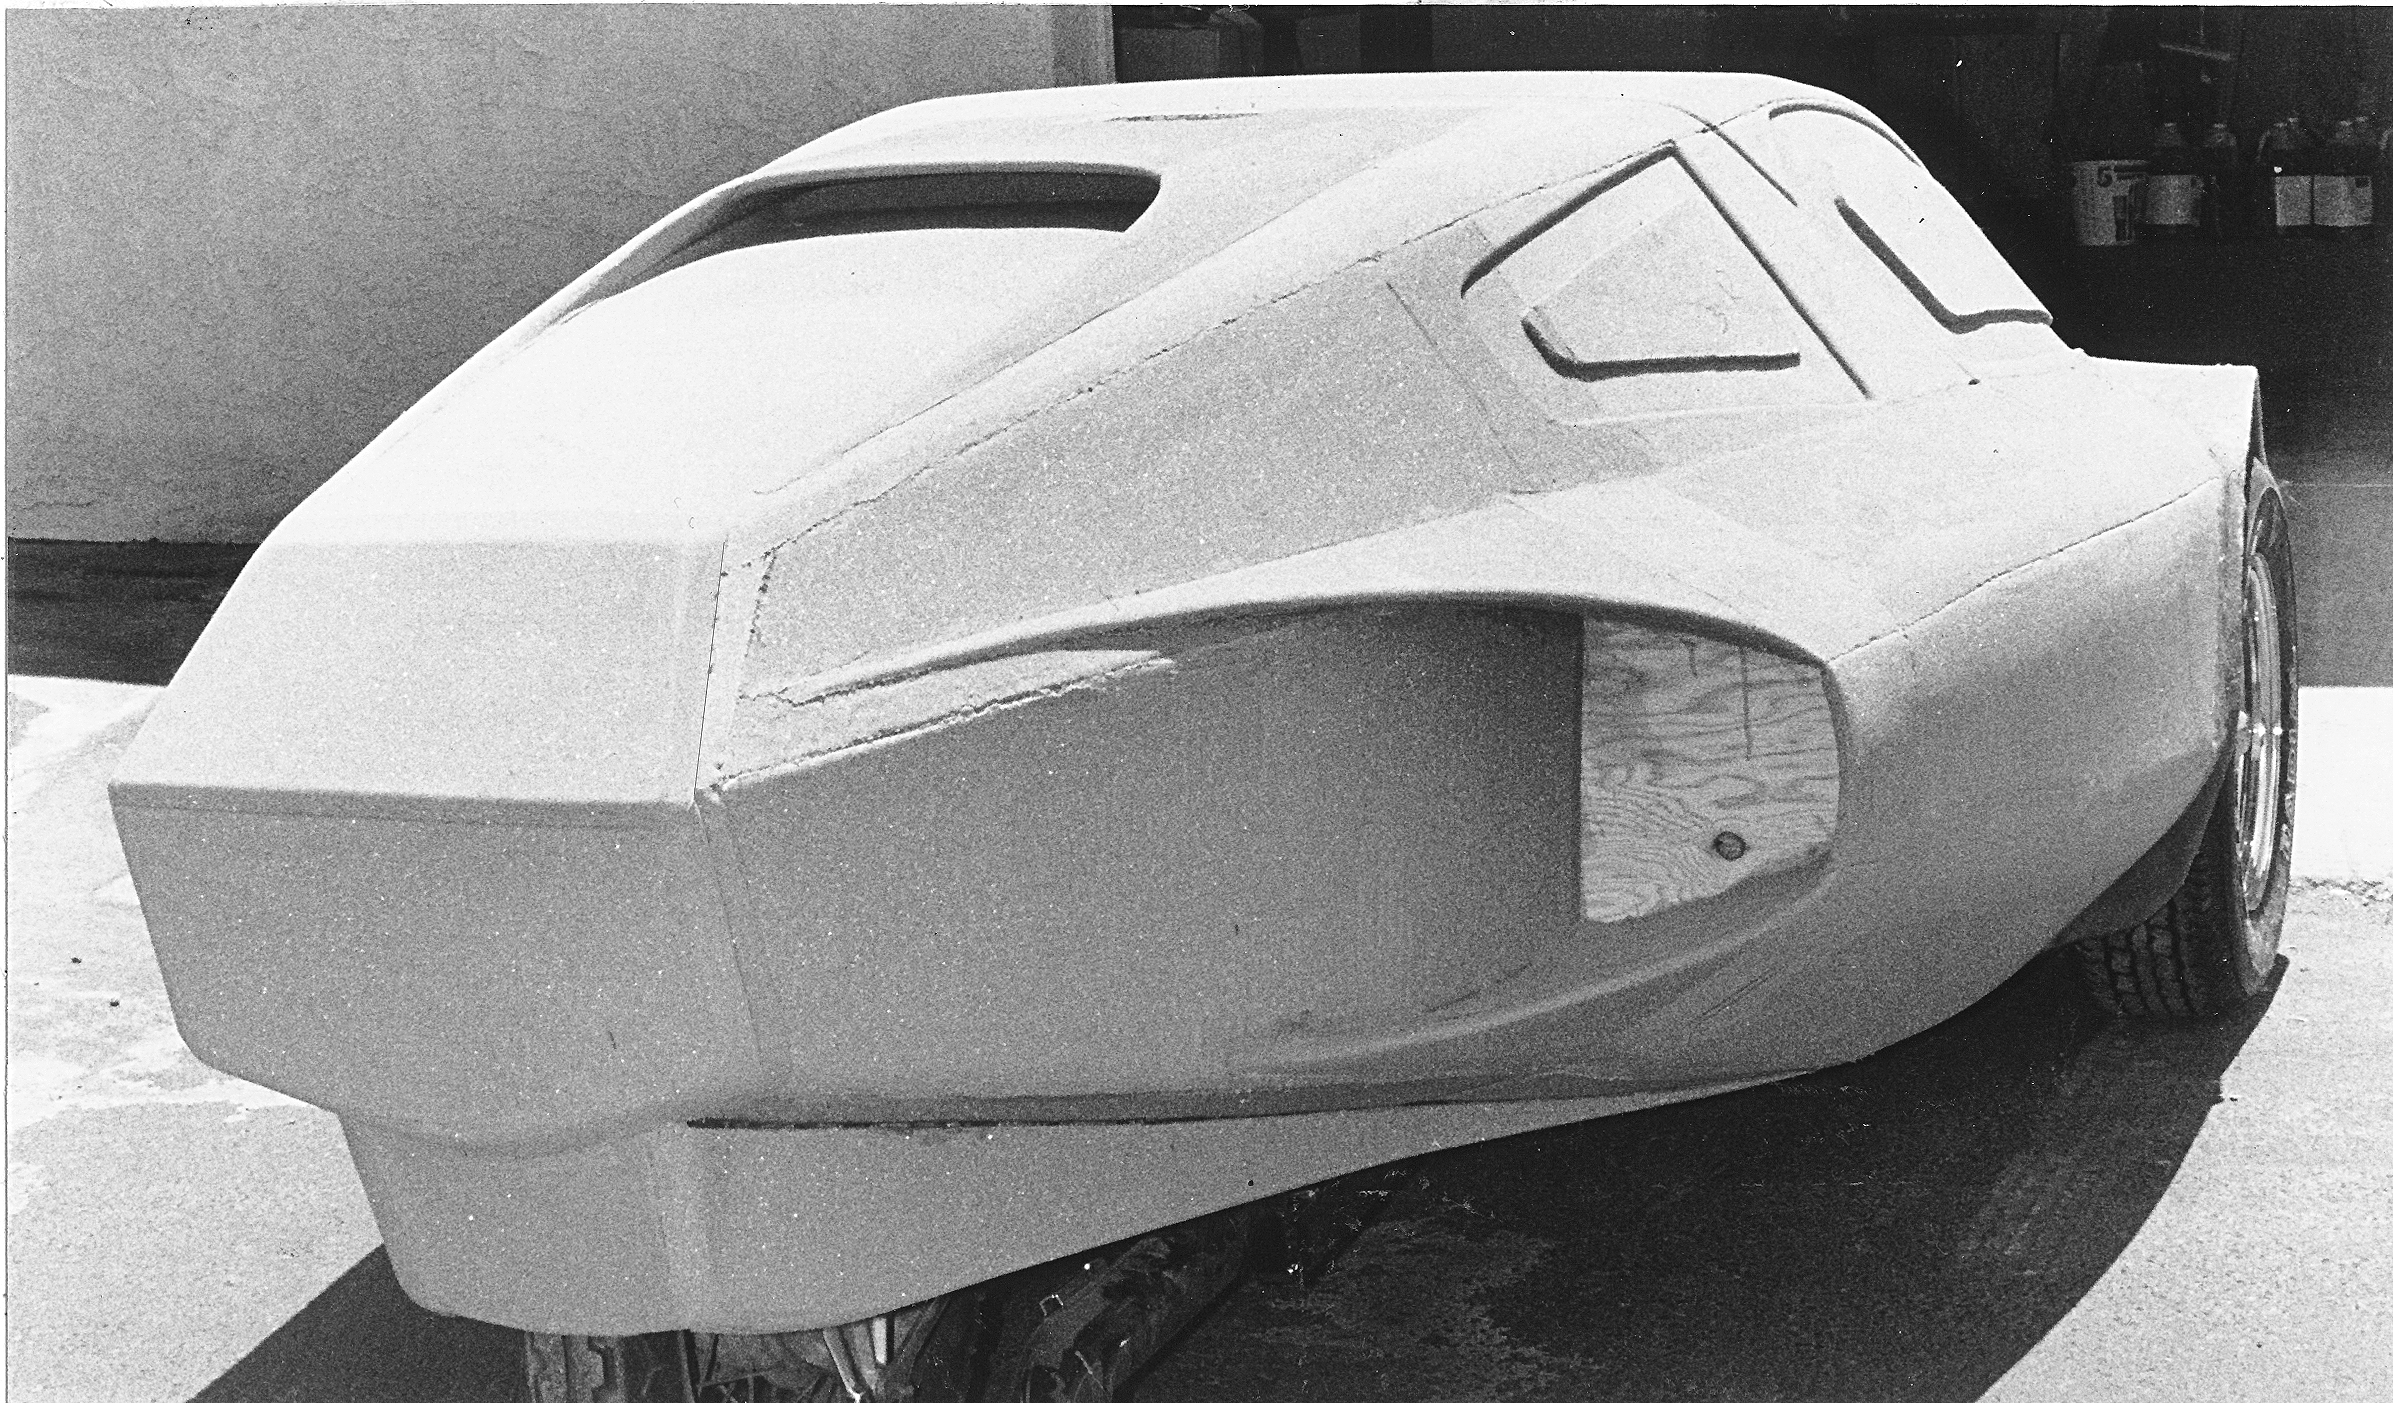
Detail the Rear: Deep scoops, long fairings, and intricate shapes are all possible with urethane
foam. And even at this stage, styling elements can still be modified by overlaying
additional foam and reshaping the surface. |
|
|
Apply a Fiberglass Skin to Encapsulate the Foam
Lay-ups of fiberglass transform the fragile foam body into a real-world automobile
body. Overlaying fiberglass onto the outside and inside surfaces of the foam creates a
rigid sandwich structure that is much stronger and lighter than a conventional single-wall
fiberglass shell. A typical exterior lay-up consists of two layers of 6 ounce fiberglass
cloth and polyester laminating resin, applied one lay-up at a time. In order to
avoid uneven surfaces, do not use mat on the exterior. Apply similar lay-ups (two
cloth) of fiberglass over the back side to completely encapsulate the foam. Extra cloth
lay-ups and mat reinforcement may be used on the back side, along inside corners, and over
areas where the foam has been sanded especially thin. When fiberglassing is done, cut
hatches, doors, and windows from the body, then detail the interior.
|
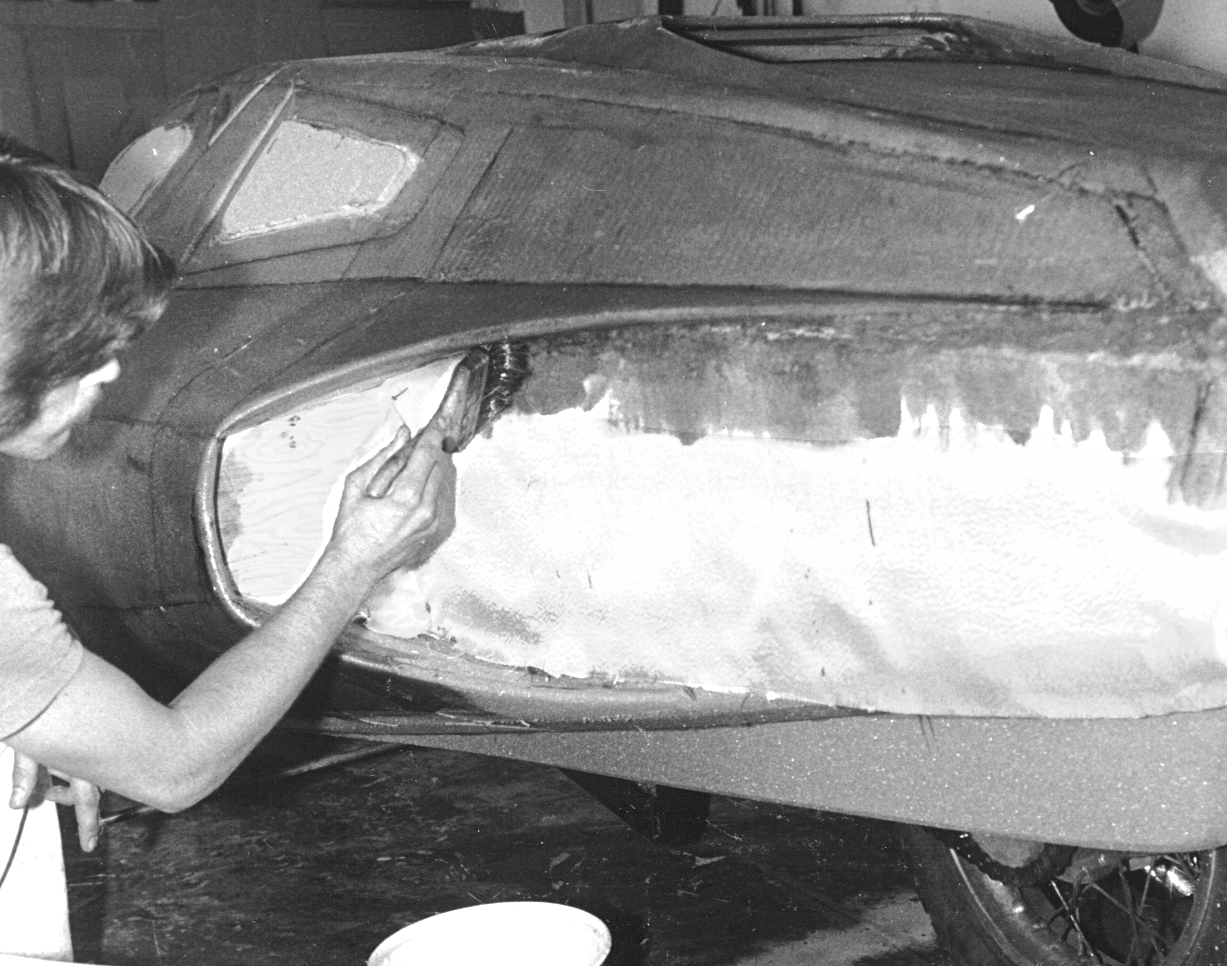
Apply Fiberglass Layups: Use an inexpensive bristle paint brush to apply
catalyzed resin over the glass cloth. Fiberglassing can be done in sections, as shown in
the photo to the left. The foam is entirely encapsulated with two lay-ups of
fiberglass. In other words, there should be no exposed areas of foam or plywood. |
|
Cut Canopy From Body: Use a portable reciprocating saw to cut doors, hatches, and windows from the body.
Tri-Magnum's clamshell canopy is stabilized by glassing a steel framework to the inside.
The framework is glassed in place before cutting the canopy free of the body.
If the canopy were not stabilized by a steel framework, it will not hold its shape
once it has been cut free of the body. |
|
|
Add Returns, Gutters, and Attachment fixtures After Fiberglassing the
Exterior
It is possible to progress to this stage in little more than three or four weekends.
Now, however, progress will seem to slow to a crawl as details such as nut-plates,
flanges, rain gutters, and other interior elements are built into the body.
|
Finish Interior and Rain Gutters: Tri-Magnum's seats and rain gutters are built into the body by cementing foam in
place, shaping it, then fiberglassing it over. The thickness of the foam does not
have to be uniform throughout the body. It can be thicker in some areas and thinner
in others. |
|
Create Flanges Around Rear Hatch: To build a lip around an opening, tape waxed Masonite to the back of the
fiberglass, then fiberglass out onto the waxed surface. When the fiberglass sets, remove
the Masonite and apply fiberglass over the back side to strengthen the flange and seal off
any exposed foam. Be sure to remove residual wax from the fiberglass by sanding and
wiping with acetone. If wax deposits are left on the fiberglass, subsequent lay-ups
will not adhere well, and may delaminate later on. |
|
Smooth the Surface and Apply Paint
The process of leveling and smoothing a fiberglass body is the most labor-intensive
part of construction. Literature on fiberglassing describes various techniques for
producing a gelcoat finish. At Quincy-Lynn, however, we used conventional autobody repair
techniques and filler materials instead. The fiberglass body is first smoothed with a
Surform file to remove large fiberglass drips and surface irregularities. It is then
covered with lightweight plastic body filler (such as "Bondo") and leveled using
traditional body-working techniques.
Catalyze a small amount of body filler then apply and smooth it with a plastic
squeegee. Cover about two square feet at a time. Wait until just after the filler sets,
then level the surface with a Surform file before going on the adjoining area. The small,
half-round files work best. Do not wait until the material has completely hardened. Use
the Surform file when the body filler is still soft enough to let the file bite easily
into the filler, producing small, curled strips of material. If the filler granulates or
rubs off (instead of cutting cleanly) it is not yet hard enough. If the body file skips
across the surface without biting into the material, the body filler has become too hard.
Once fully hardened, the surface will have to be leveled with a sander, which is a much
slower and more labor-intensive process. Immediately after the surface has been leveled
with the file (before the material fully cures), use a sanding block with 36 grit paper to
remove the file marks. After the filler has cured, smooth out the surface with 100 -
120 grit sandpaper.
The leveled body is then sprayed with a polyester primer/surfacer, such as
"Featherfil" or "Eliminator." It can then be painted with any of the
traditional automotive grade paints. A polyester primered finish is not quite as hard as a
traditional gelcoat finish. However, results come much more quickly.
|
Body Nearing a Paintable Stage: Photo to the right shows the Tri-Magnum body after it has been filled and leveled.
At the stage shown in the photo, the body is nearly ready for paint. The dark
areas of the lower portion of the body have already been sprayed with Eliminator.
Eliminator must be finish-sanded before applying primer. |
|
More Information and a One-Hour Video
The foregoing article uses Tri-Magnum to illustrate the one-off fiberglass-over-foam construction technique. The actual Tri-Magnum plan-set provides a far more in-depth discussion and over 130 high-resolution photos and illustrations. If you would like a video of the process, consider purchasing the XR3 Hybrid plans. Although XR3 plans are specifically oriented to the XR3 Hybrid, in reality, they are a goldmine of information on how to build virtually any shape or structure of foam and fiberglass, including car bodies, hovercraft, and boats. The XR3 manual includes lots of technical information and over 200 illustrations and photos taken while the XR3 was under construction. XR3 plans also include a one-hour video on DVD that shows the various steps and techniques involved in building an entire car body. When you watch the video, you will understand how to use this user-friendly system to custom build any of your special projects. Plans also touch on hand-laid carbon fiber construction. Click here to see an image of the Plans-on-Disc Package.
XR3 plans come in three variations. For those who want to use the plans for general information, the Plans-On-Disc package gives you all the necessary information at the lowest possible price, including the video on DVD. Click here to purchase the XR3 Hybrid plans.
|
|
|
